
In this tutorial, you will learn how to do live video out on the GoPro Hero 4. You will then be able to connect it to the Datavideo SE-2200, HS-2200, or SE/HS-2800 HD Switcher directly with a micro HDMI to HDMI cable, or with a HDMI to SDI converter (like the Datavideo DAC-70) for a longer cable run.

The new GoPro Hero 4 HD Camera is an incredibly powerful and versatile camera for its relatively low price tag. Most people use it for action sports or other types of extreme applications, however it also useful for live production at any venue. With a low profile and high quality live video output via its micro HDMI connection, you will find it extremely useful on any shoot.
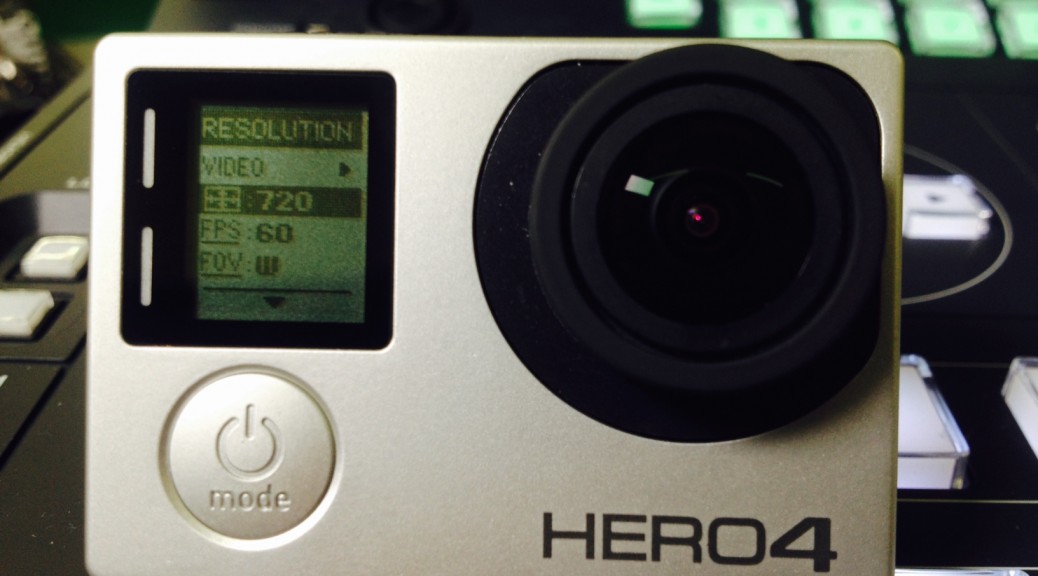
STEP 1: Set your GoPro Hero 4 to 720p60

To do this, hit the ‘Mode’ button until you set the Camera in ‘Video Mode,’ you will see a video camera icon. Then push the ‘Settings’ button on the left side of the camera with a wrench icon on it. Use the ‘mode’ button to toggle between resolution, frame rate, and perspective. Press the ‘Record’ button on the top of the camera to change the values of each to Resolution of 720p, at 60 Frame per second. When you are done, press the ‘Settings’ button to save settings.
STEP 2: Set your SE/HS-2200 to 720p60
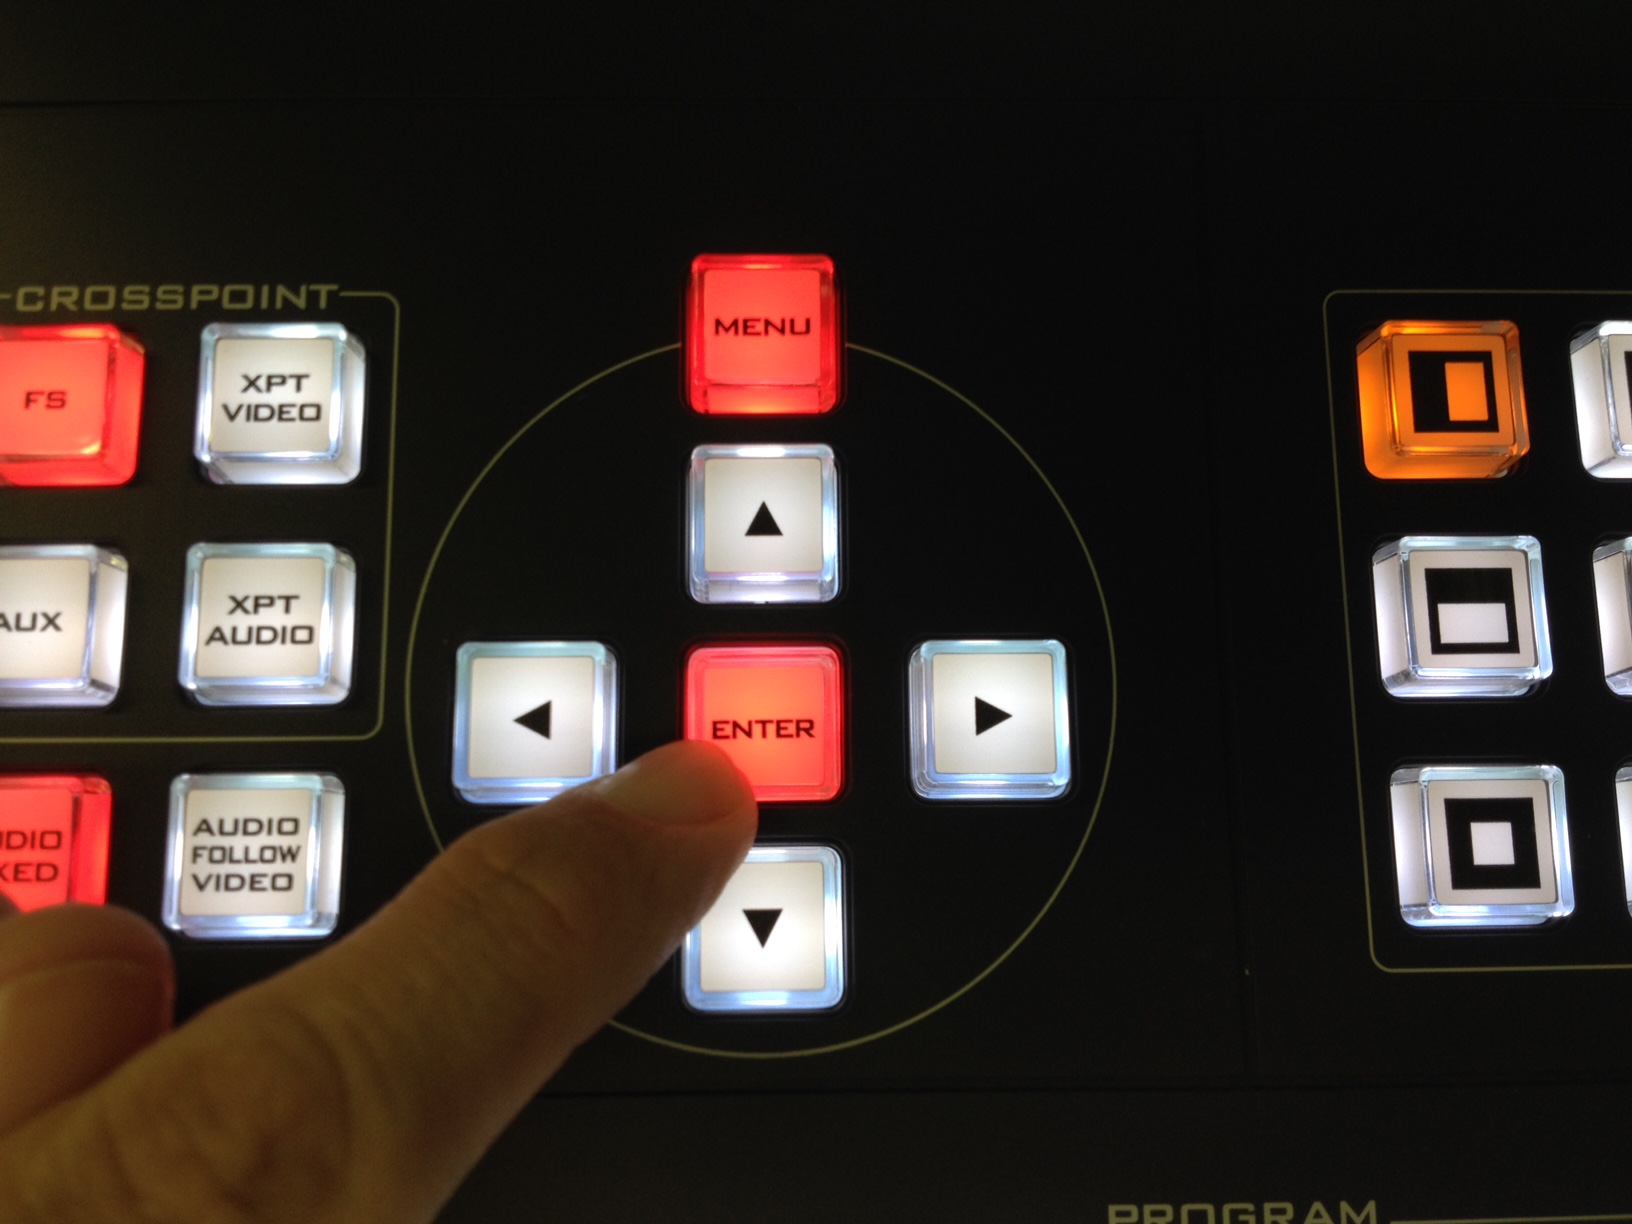
Turn on your switcher. On the SE/HS-2200 control panel above the Program Bus, press the ‘Menu’ button.

Select “1. Mode” using the ‘Right’ arrow’ button.
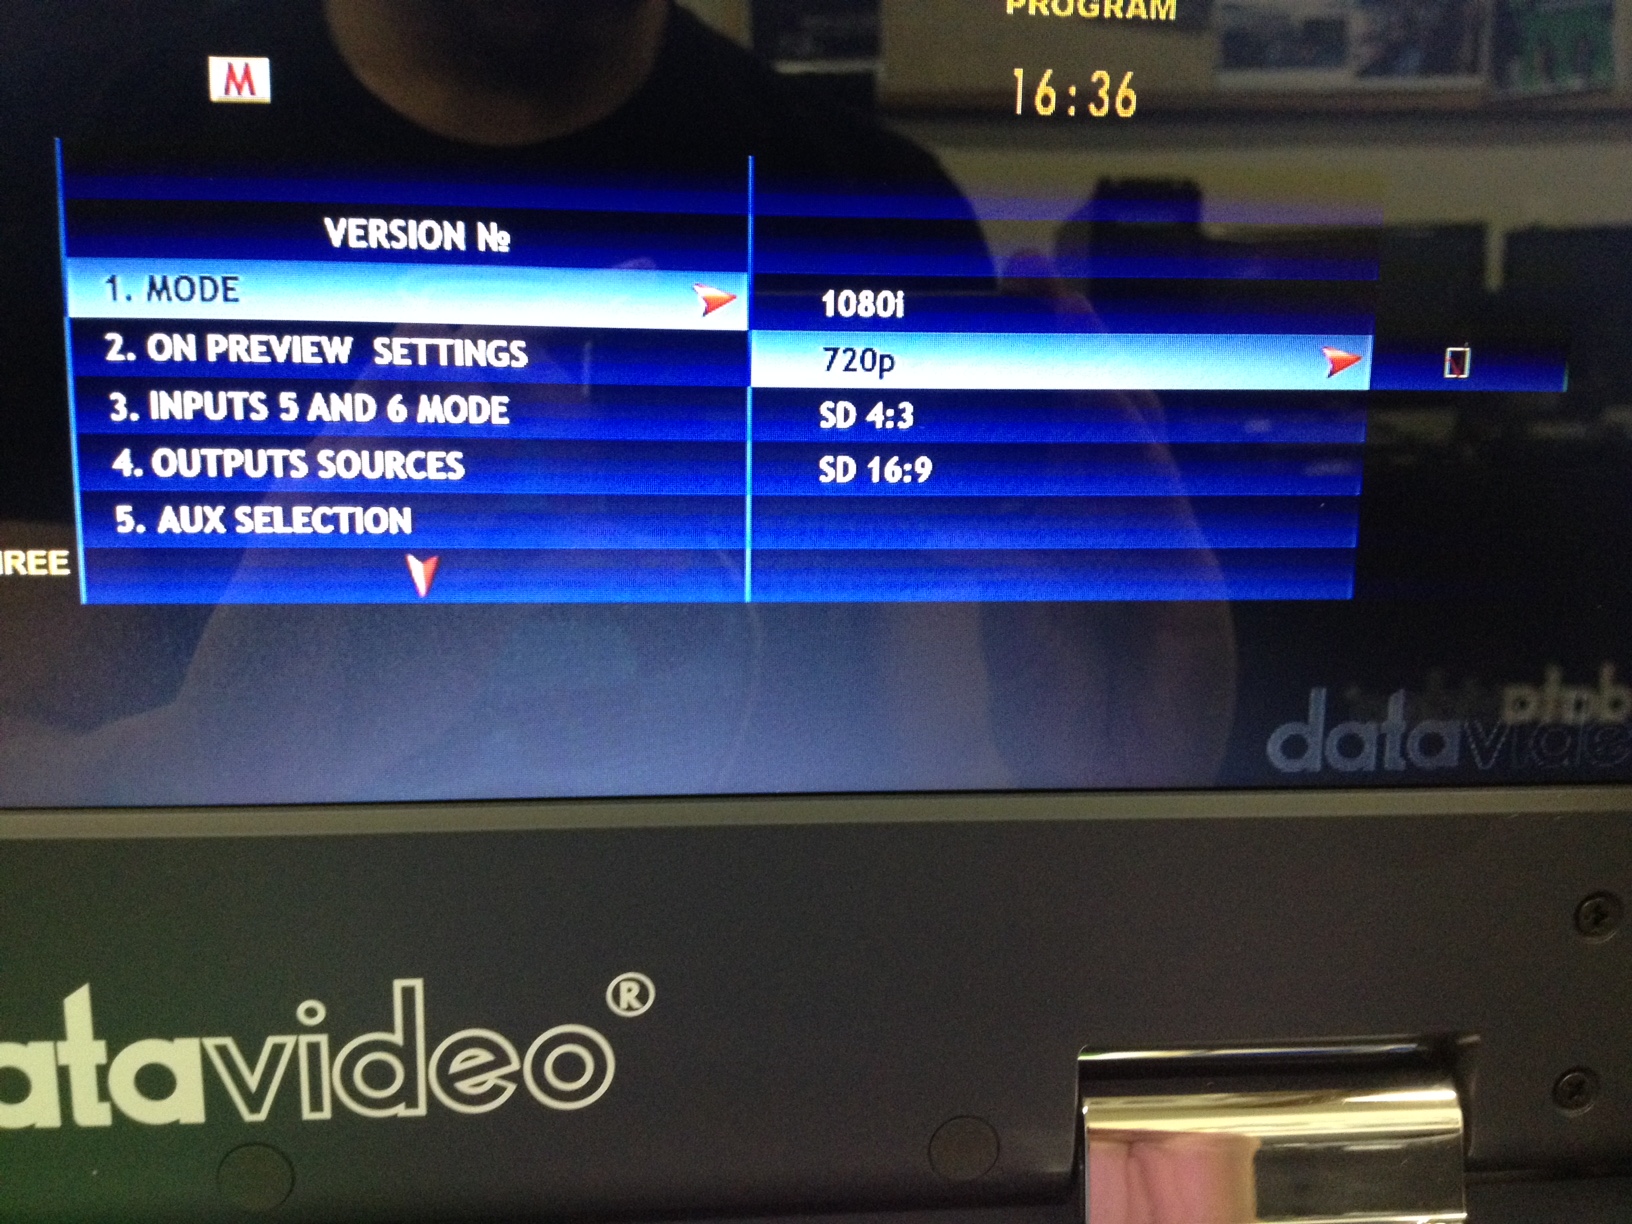
Use the ‘Up’ and ‘Down’ arrows to highlight “720p” and use the ‘Right’ arrow to select. Check the box using the ‘Up’ arrow button, and finally press the ‘Enter’ button to activate 720P.
Your HS-2200 will restart and flash. When the multi-view comes back on, the HS-2200 will be set at 720P.
STEP 3: Select ‘HDMI’ for Input 5 and/or Input 6 on the SE/HS-2200. Skip this step if you are using a converter to convert your signal to SDI for a long cable run.
Press ‘Menu’ and toggle down to ‘3. INPUTS 5 and 6 MODE’ Select using the ‘Right’ Arrow. Use the ‘Right arrow again to select the input and ‘HDMI.’ Use the ‘Up’ arrow to check the box, and press ‘Enter’ to confirm your settings. Press ‘Menu’ to go back.
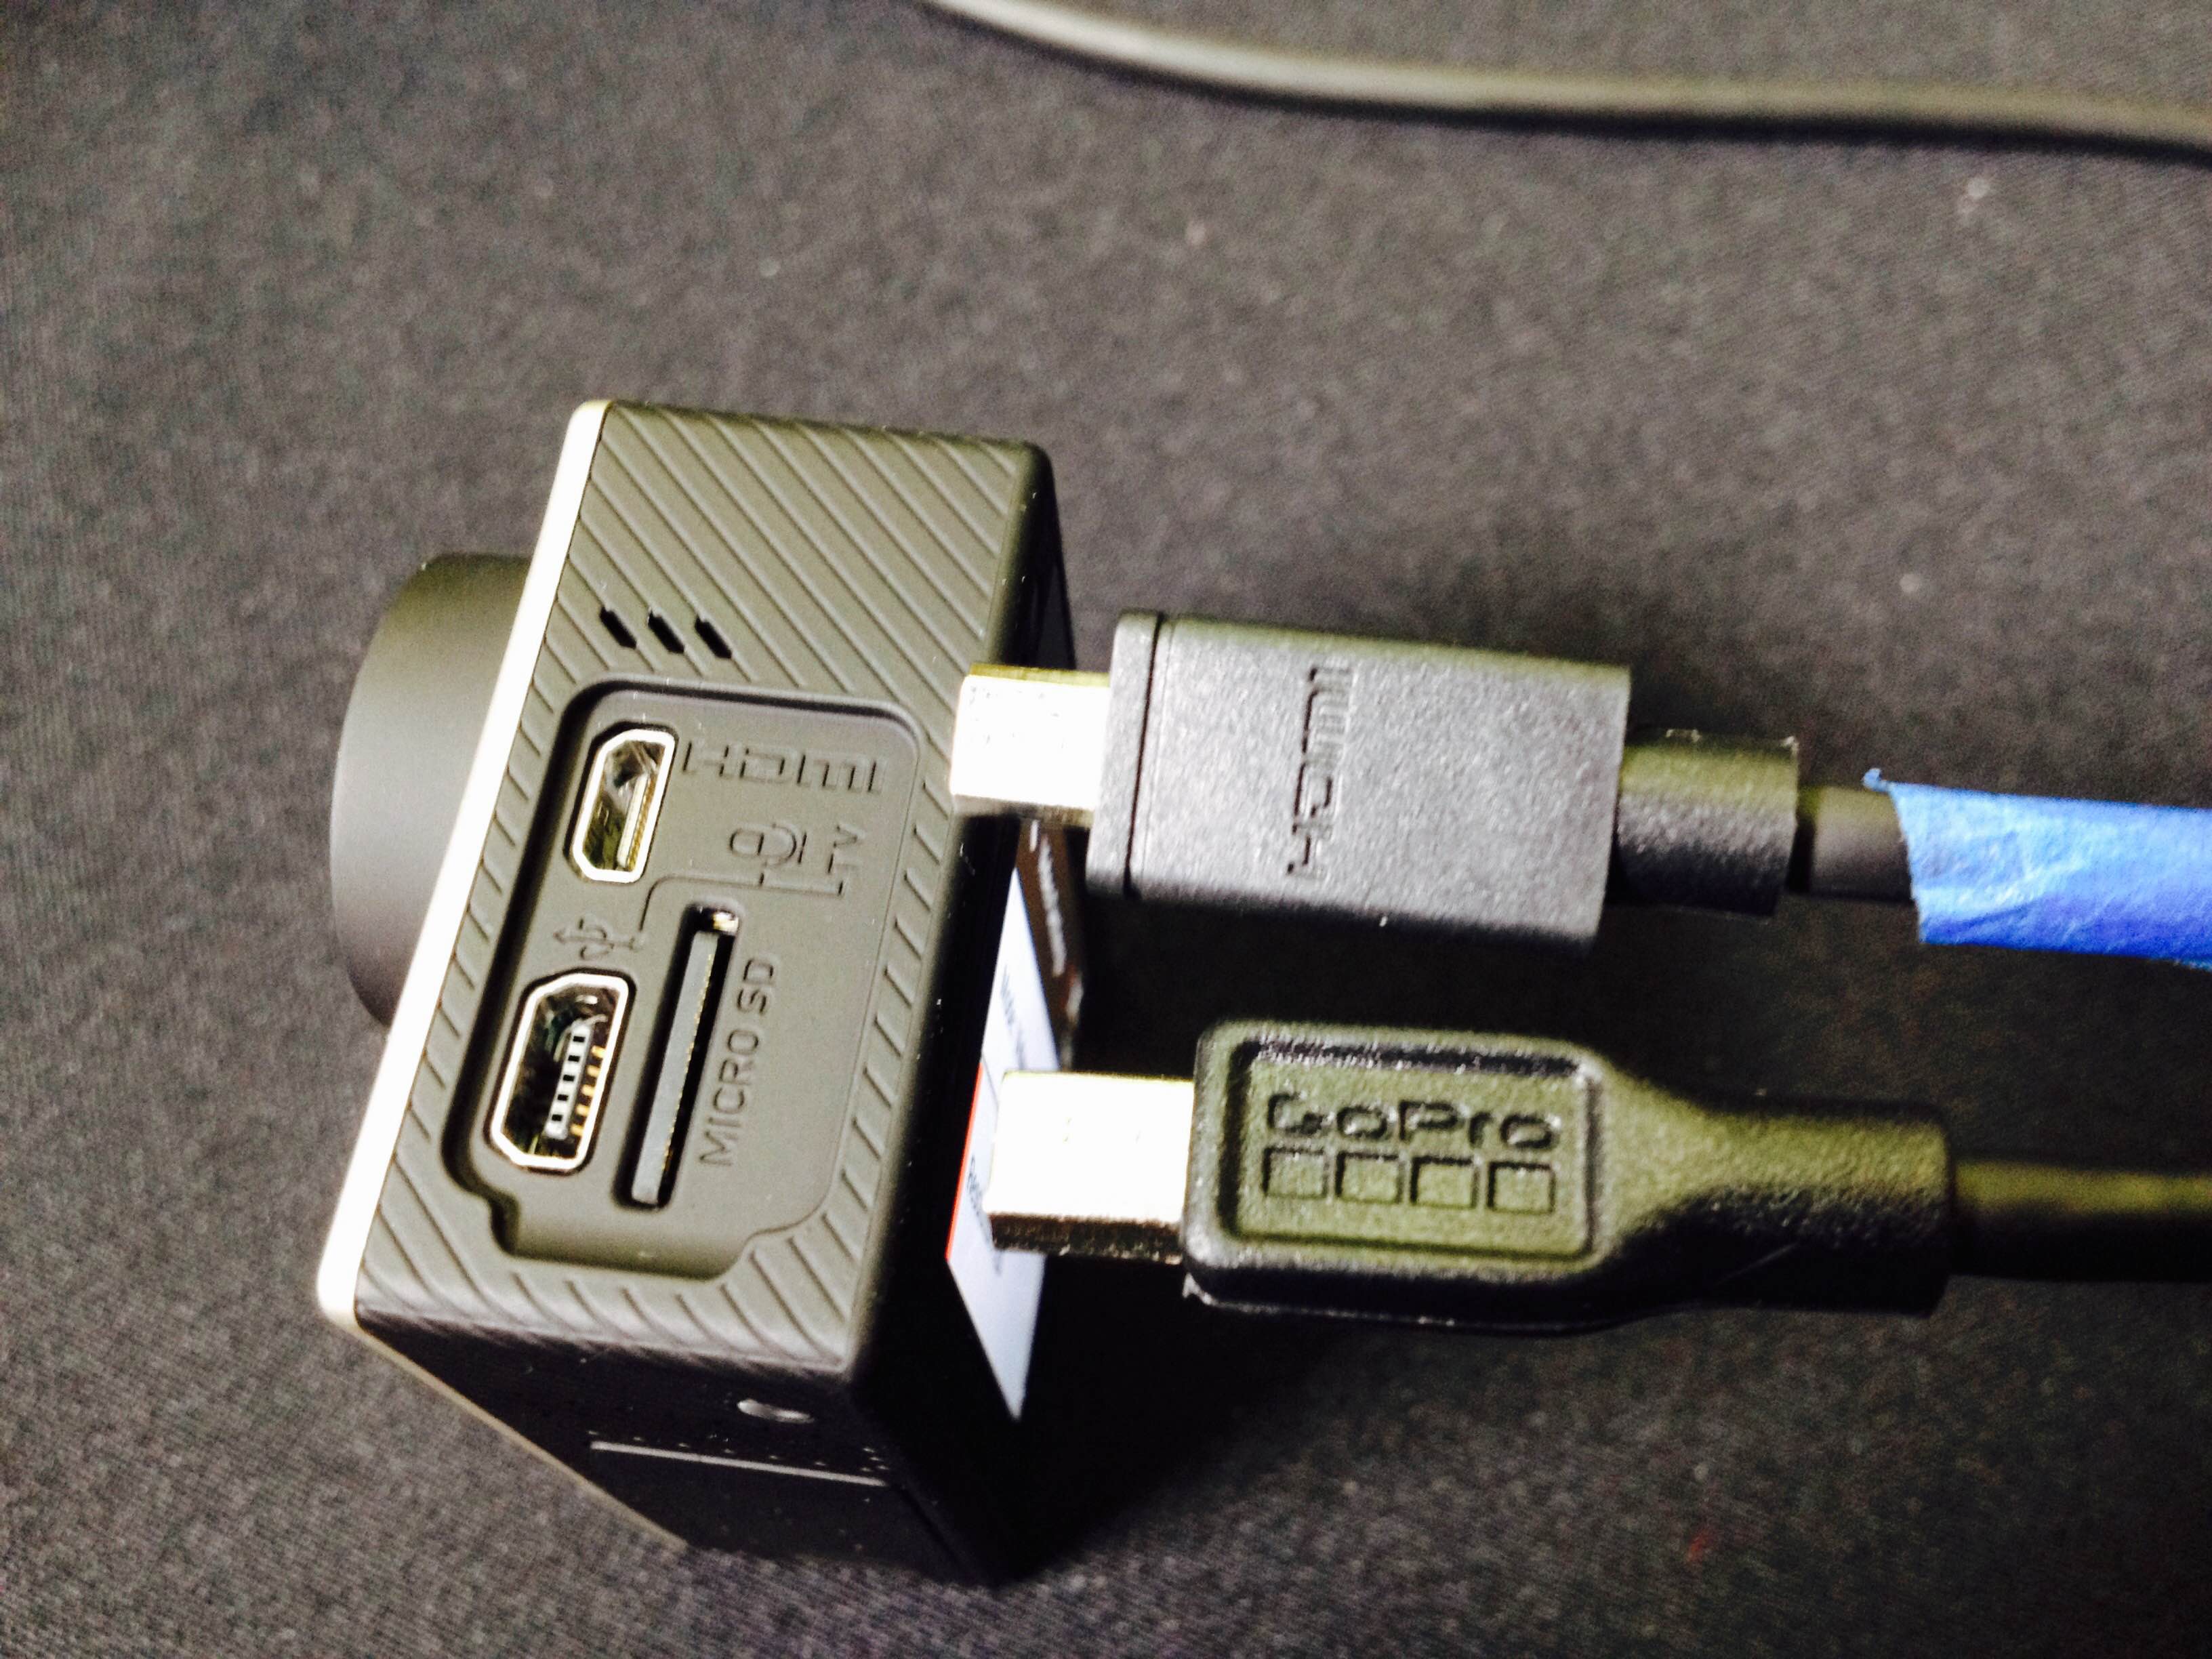
STEP 4: Connect your GoPro Hero 4 Camera(s) to a power cord and HDMI cable run
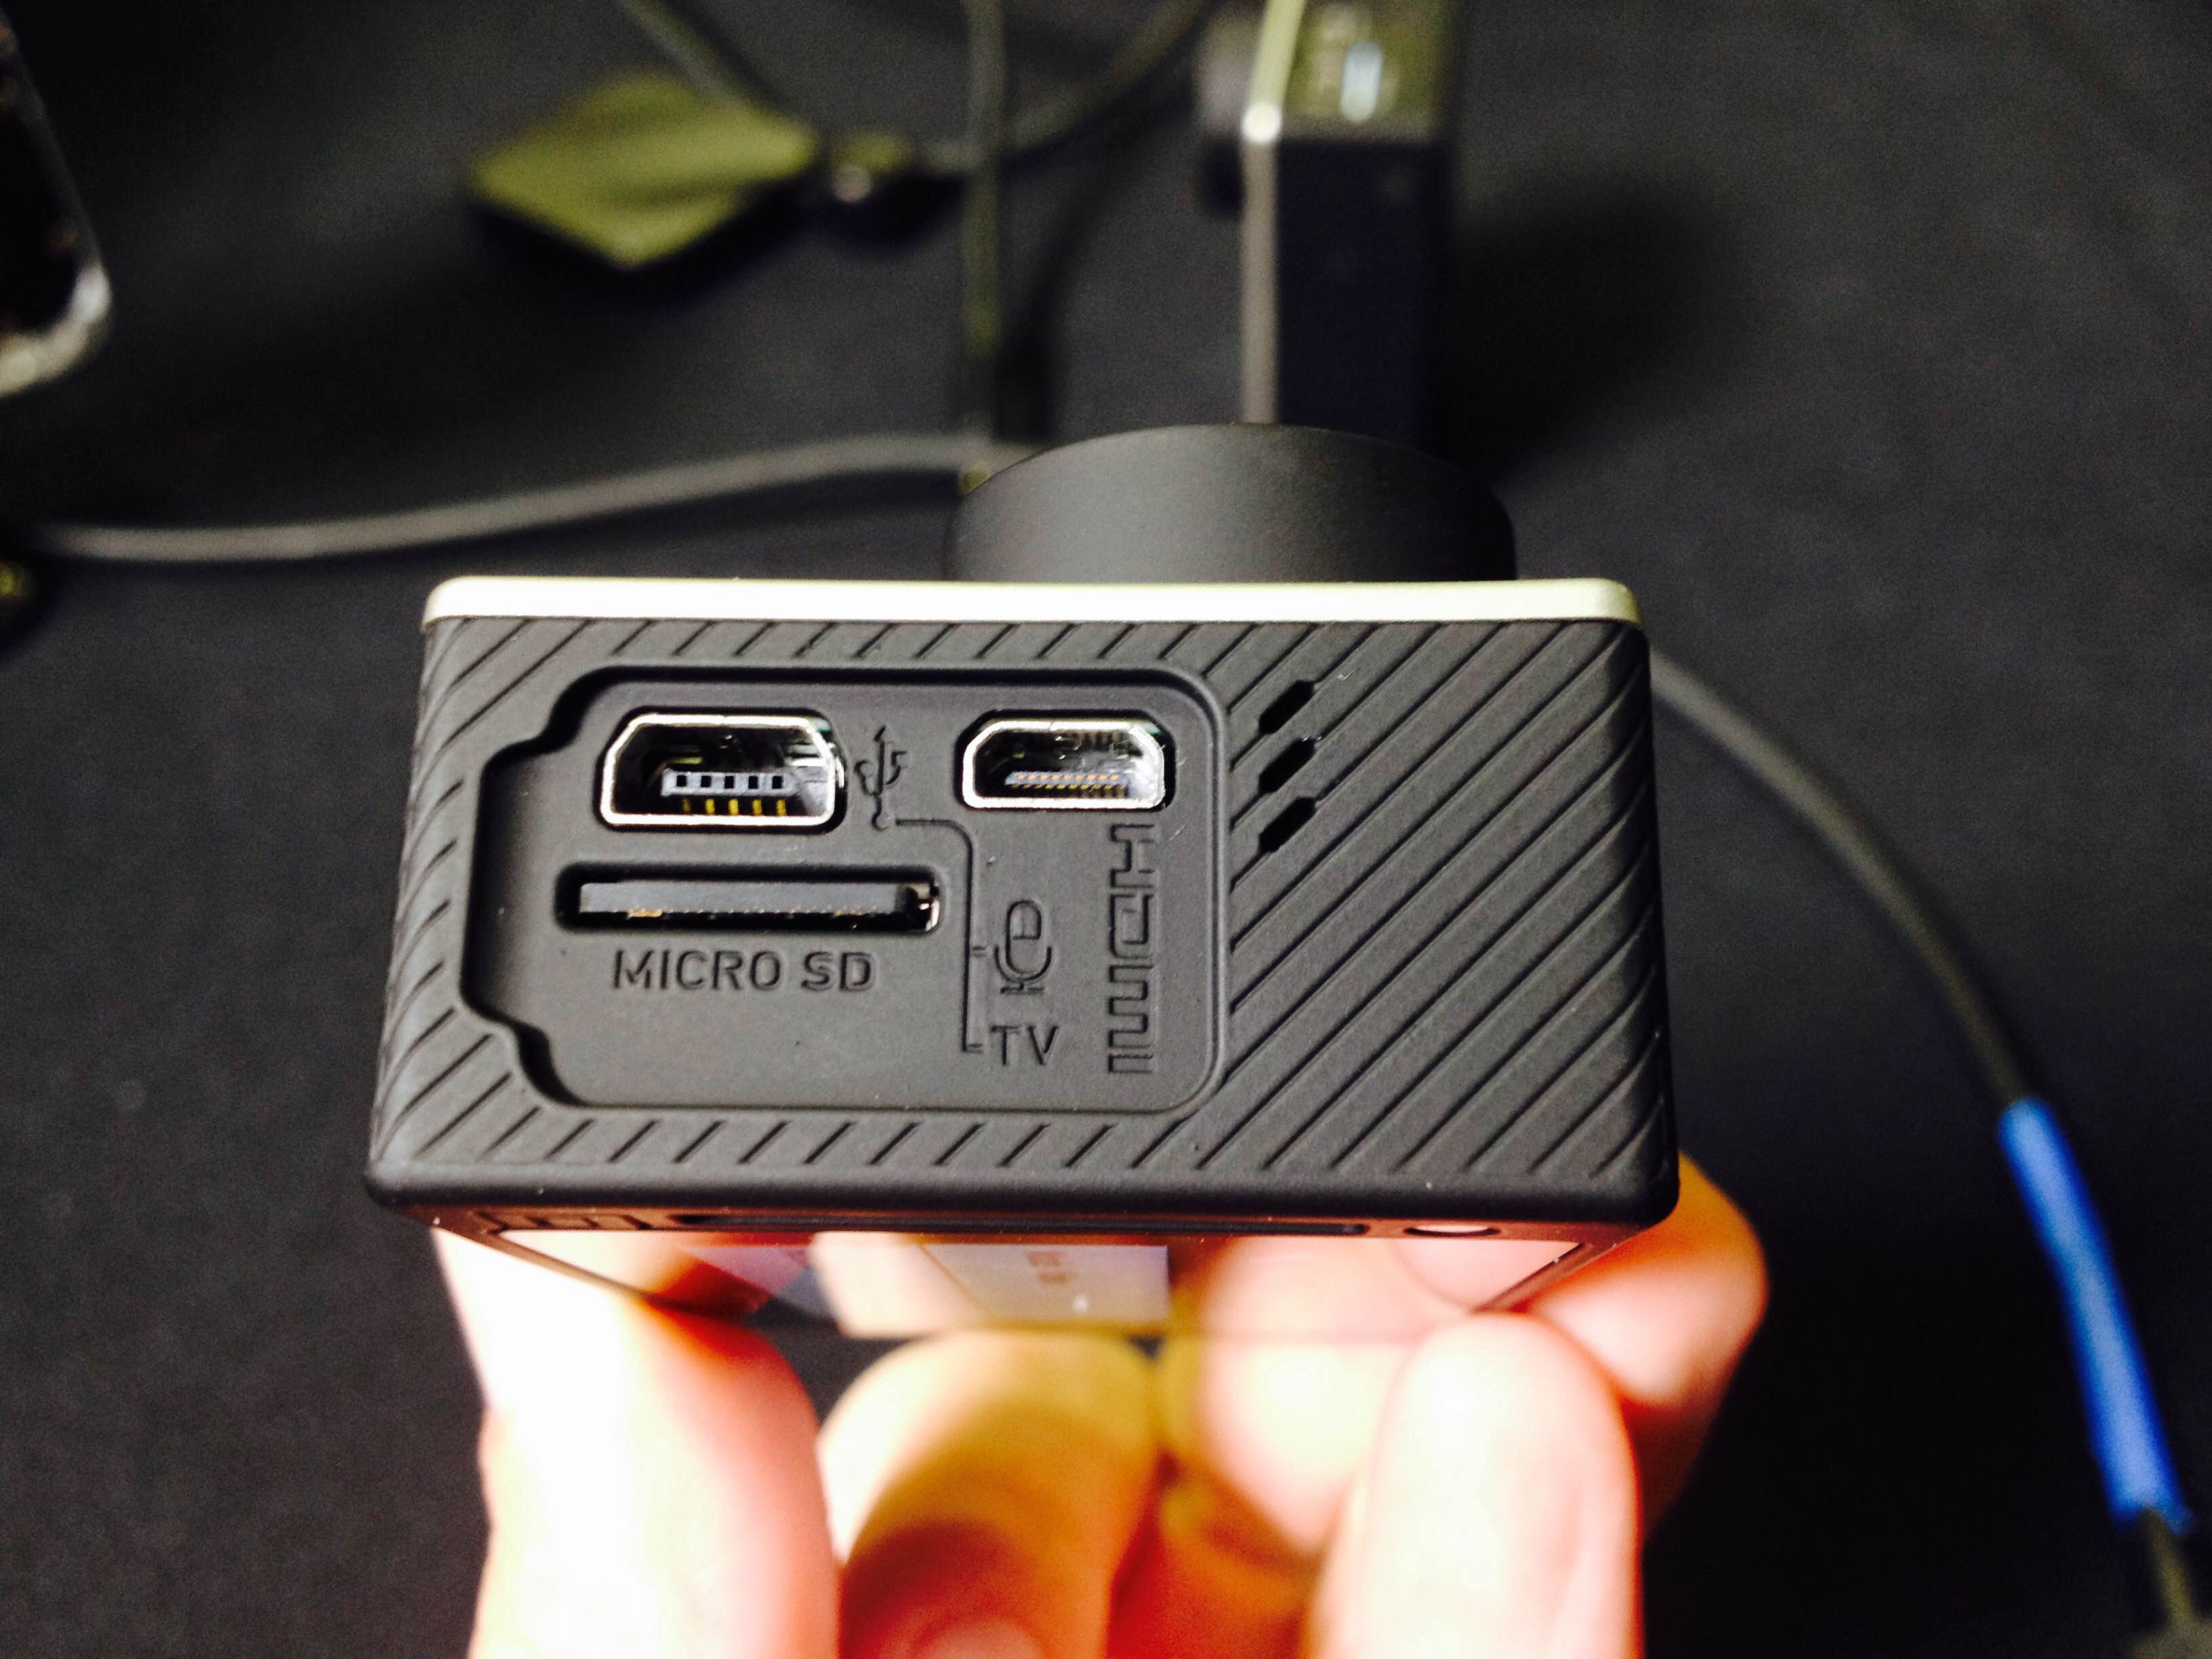
Even if you are planning a really short shoot, you need to connect your GoPro to a power source using a USB cable like the one that came with your camera. You can use a USB power to wall socket converter (like for your smartphone) and run extension cables from there. You need to have a micro HDMI to HDMI cable or be a micro HDMI to HDMI converter for your HDMI male to female cable to have a live video feed output from the camera
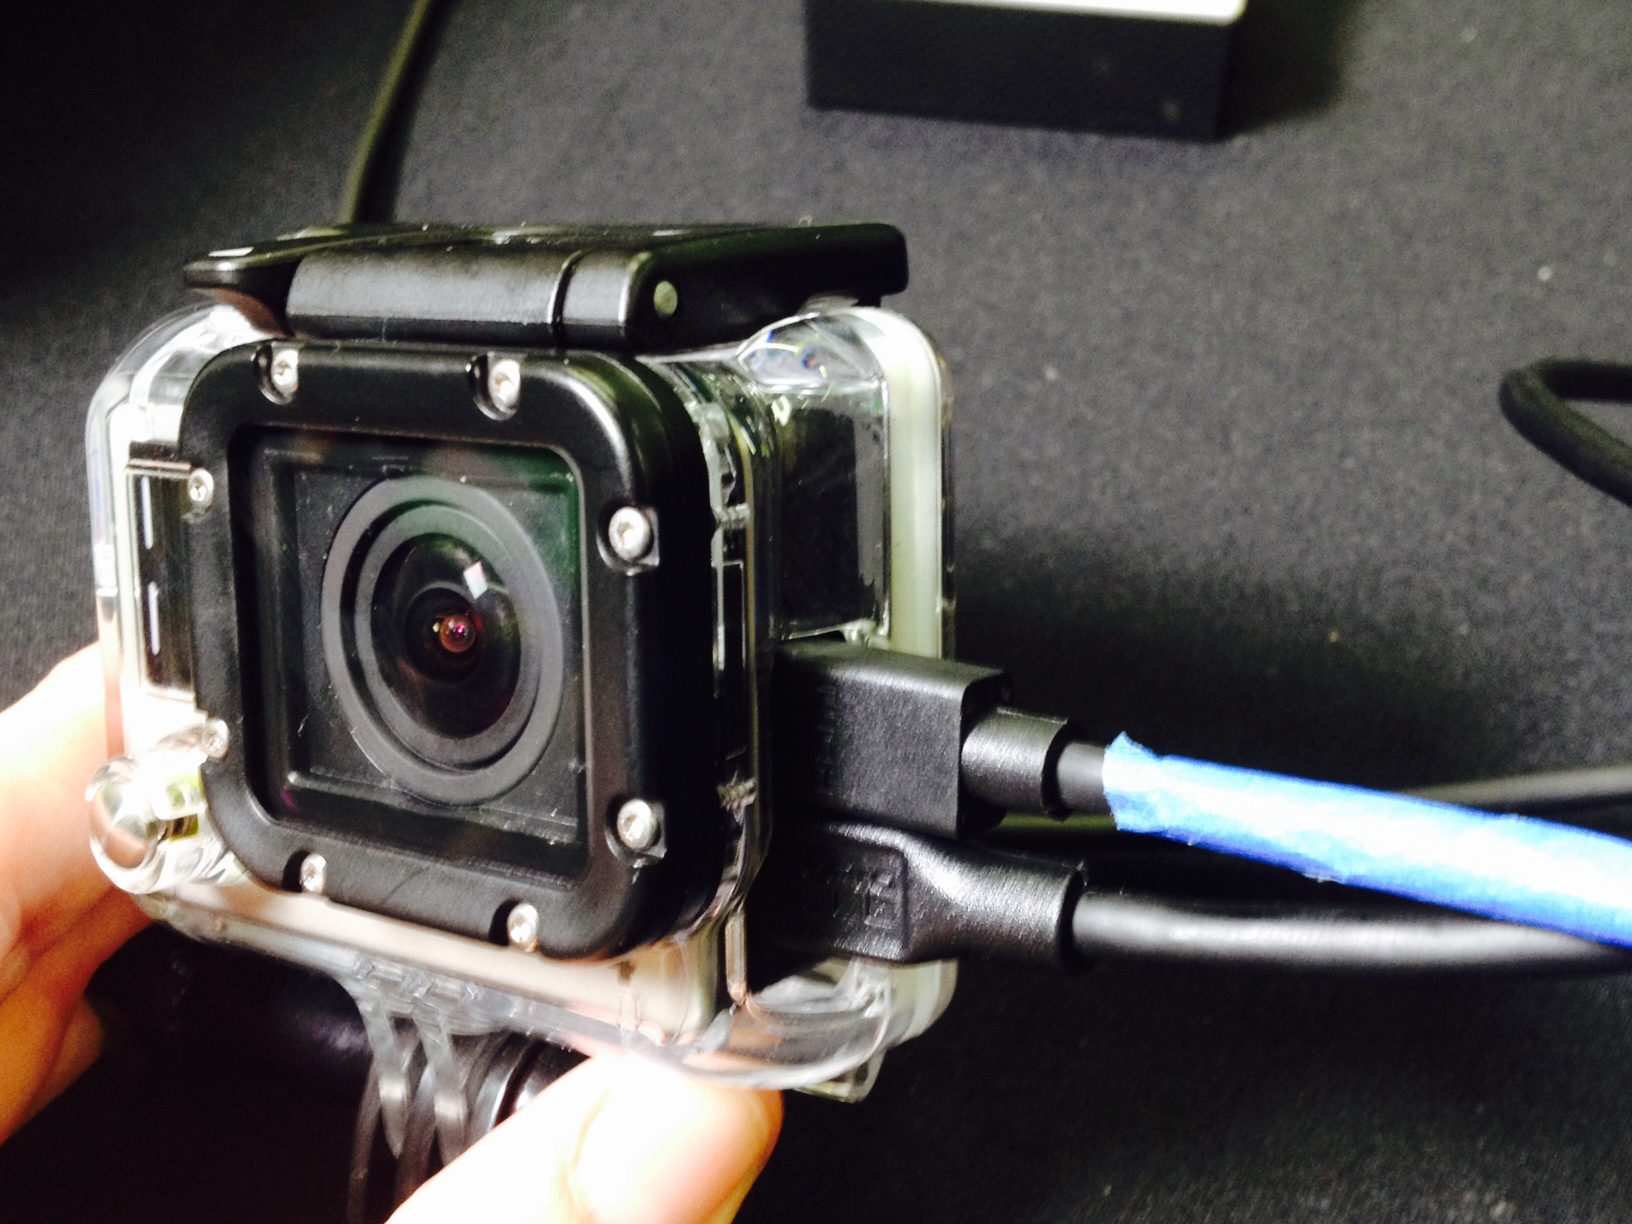
A GoPro Skeleton Case or ‘Frame’ case is needed for mounting the camera and still having access to the USB port for power and the micro-HDMI port for connecting the HDMI cable your live feed. The same skeleton case for the Hero 3 and Hero3+ works just fine for your Hero 4, if you have one or see one for sale online,
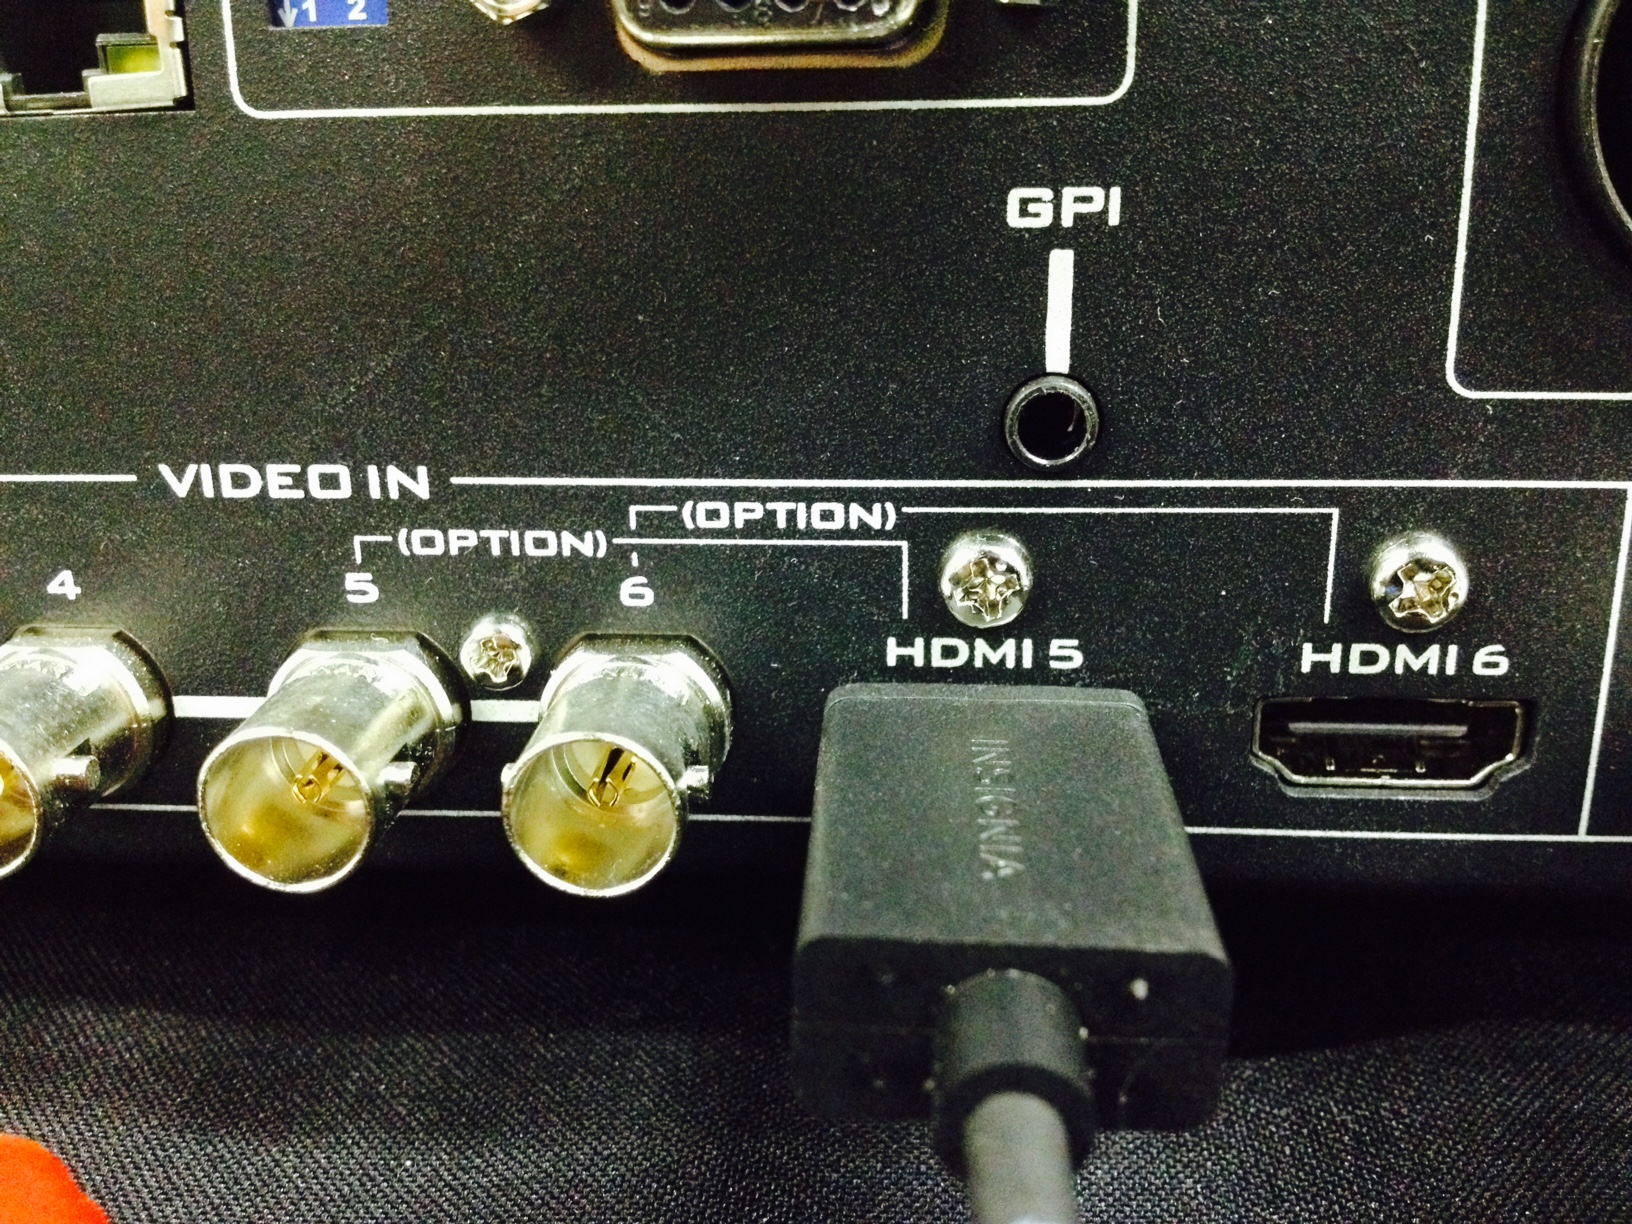
STEP 5: Connect the cable from your GoPro to the SE/HS-2200
Connect the video cable from your GoPro Hero 4 to Input 5 or 6 for HDMI, or any other input if you are converting and using SDI.
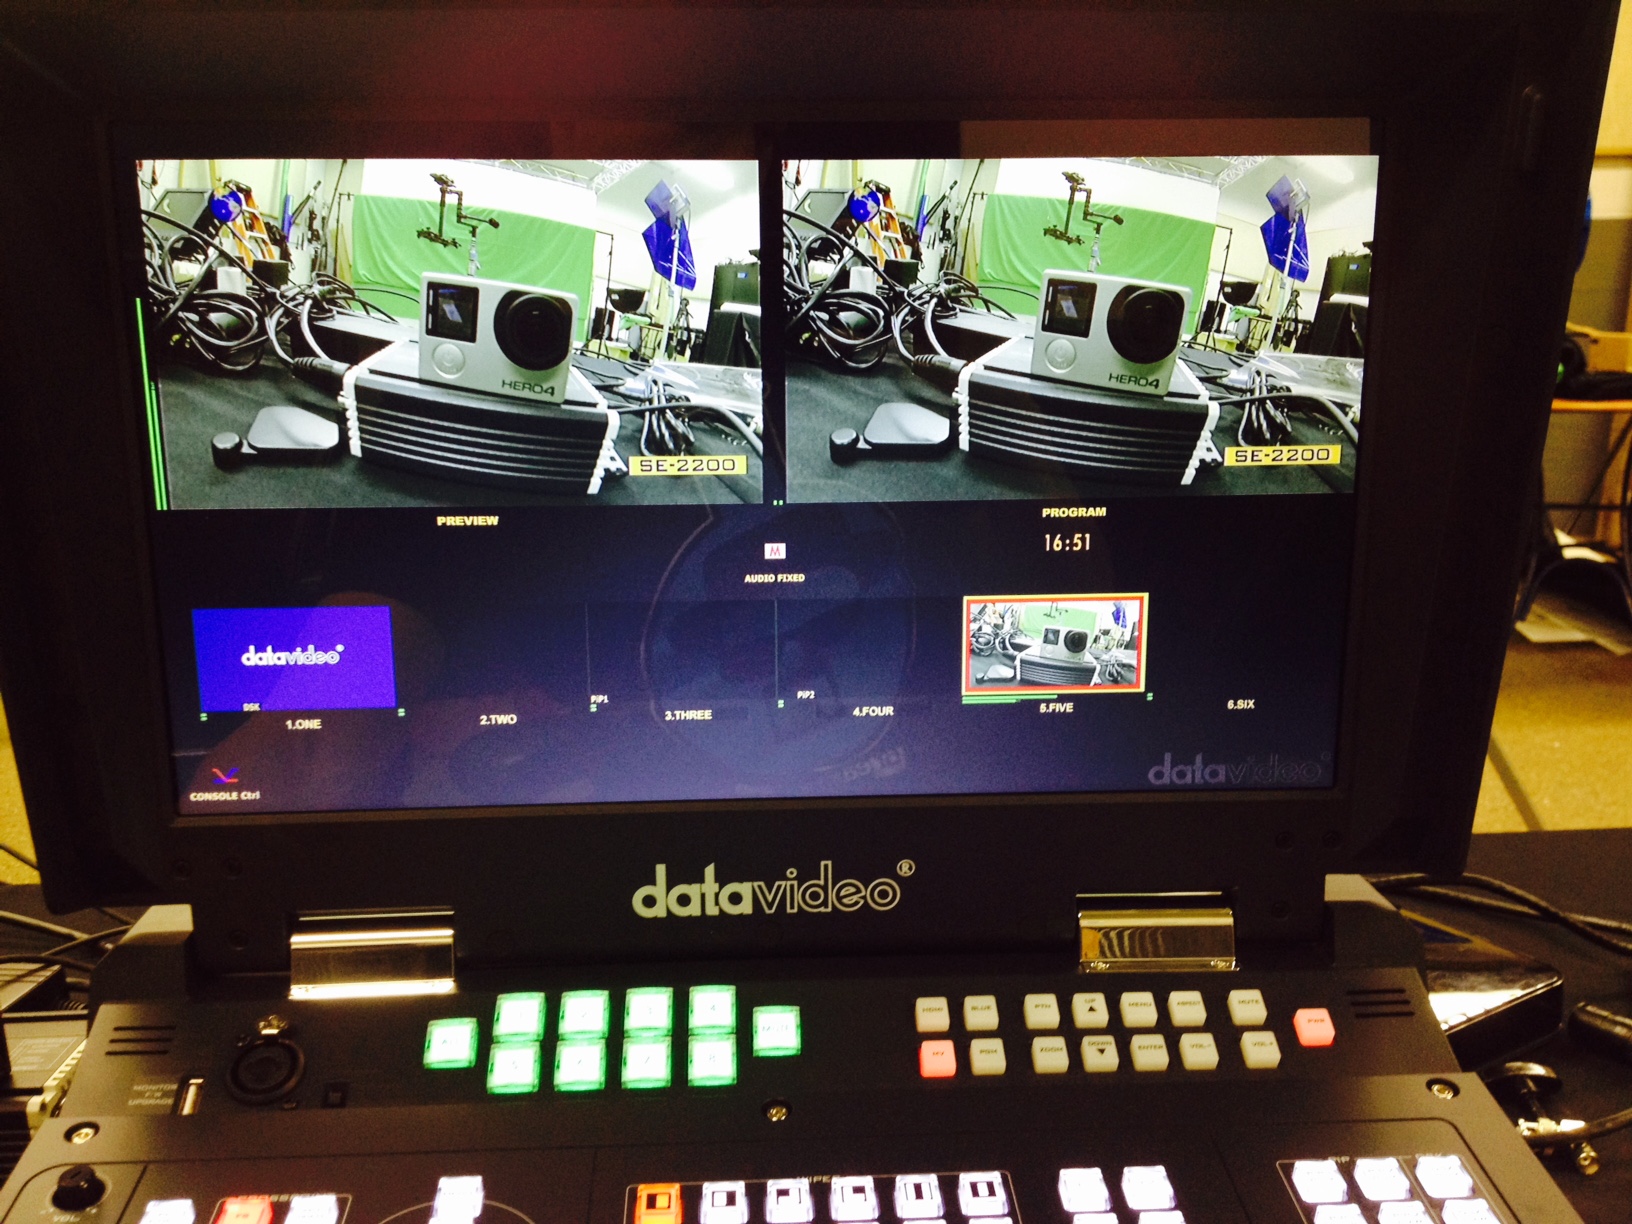
STEP 6. Begin Shooting!
Can I use a DAC9p if your go pro is in 720P.
Benoit
What type of video to audio delay is going on. because HDMI does not provide a real-time output its slightly delayed do to it being a processed signal TTL. What are you doing to compensate for this with the LIVE audio?
how can remove the display of go pro hero 2 or 3 from the screen because its come to the mixer and record in the video
example : the logo showing video on the display screen in go pro the same it showing in the recorder
Hi Tony,
Check the menu setting in the GoPro to see if you can turn the OSD off.
Thanks!
ive HS2200. and normally we just do 3 live video camera. nx100.
so, if i change HS-2200 to 720p60 for gopro hero 3. is there going to effect my other camera?
2nd question is,
when i use DSLR 5Dmark2, the display preview on my HS2200 but not on the camera itself.
is there any solution to this matter? because camera operator need to have a visual to what he want to shoot.
Passive splitters are cheap and don’t will need to get plugged in, but they’re junk. In the end, HDMI splitters often locate a location in consumer’s homes. You can take advantage of this HDMI splitter together with four devices simultaneously.
you need a DisplayPort to HDMI adapter. you can find it on Google:) the port you’re trying to fit an HDMI cable into is a Displayport,not HDMI.