
A lot of the Educational Institutions are offering online programs for a more flexible learning experience. We can now earn an MBA or BS degree from a top University at the comfort of our own home just by logging onto the school’s website. Many schools use their blackboard website to have virtual classrooms where students and professors use forums to have discussions and classroom interactions. This method works in business classes, literature classes, and social science classes where critical thinking and class discussions are vital parts of learning. What about math and science classes where you need to see the experiment and the detailed steps to solve an equation? It’s beneficial for students to be able to see how the professor solves a complicated http://www.exambusiness.com calculus equation or what happens when liquid diffusion occurs in a lab experiment. The best way to demonstrate these lessons visually is to produce a video of the professor solving an equation or doing a lab experiment. These videos can be easily produced using a 3 camera setup.
Here is an example of how to produce an e-learning video in classrooms and laboratories.
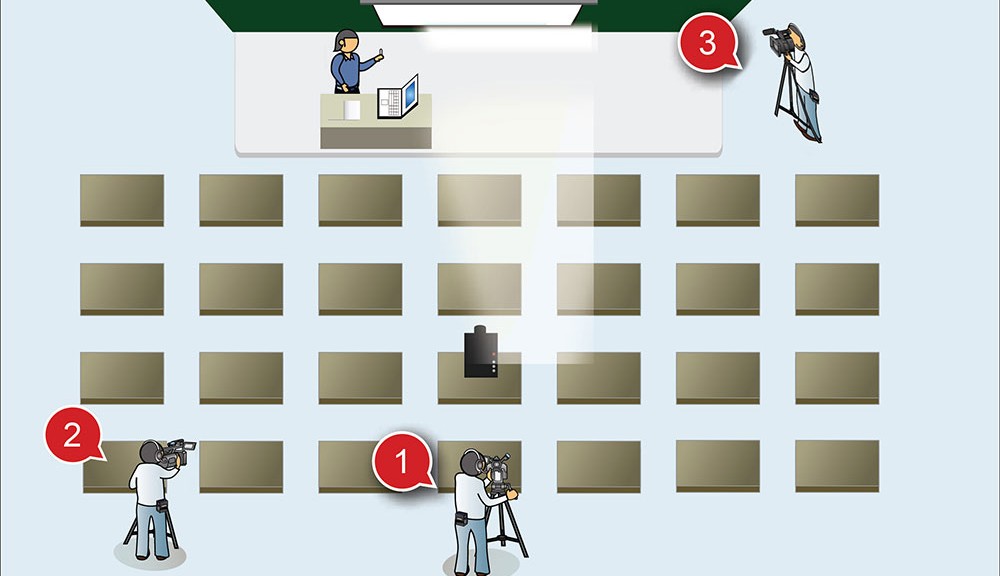
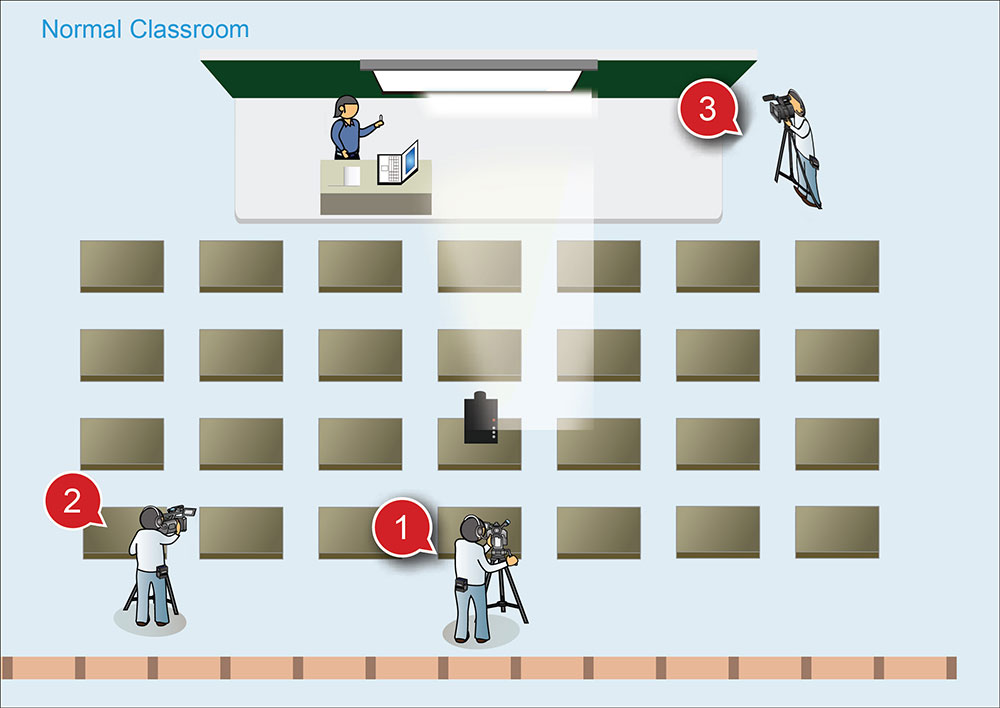
Step 1: Plan camera positions by figuring out the best angles depending on the size of the classroom and subject(s) of the video. NOTE: Each camera should be on a tripod in order to change shooting angles quickly.
Camera 1: Position it in the back of the classroom in the center. This camera will be shooting wide shots and medium shots of the entire classroom.
Camera 2:Position it in the back of the classroom on the left side. This camera will be shooting close up shots and medium range shots of the blackboard or the lab table where the experiment is being conducted.
Camera 3: Position it in the front of the classroom exambusiness by the stage on the right side. This camera will be shooting close up shots of the professor but could also capture medium close ups.
Step 2: Connect all the outputs of the cameras to a switcher, like a Datavideo HS-2200 hand carried mobile studio. Make sure the output resolutions of the cameras match the resolution of the switcher.
Step 2.5: If using PowerPoint, connect the display output of a computer to the switcher via HDMI input. In this example, we are using HS-2200 hand carried mobile studio from Datavideo. The HS-2200 has two HDMI inputs, and PowerPoint slides can be shown using a PIP feature within the switcher to enhance the production quality of the final output.
Step 3: Record the final output to a hard disk or solid state drive recorder, like a Datavideo HDR-60 or HRS-30. The cool thing about these Datavideo recorders is that the drive is removable; making it easy for a file transfer after the recording is finished.
Using these steps, you can produce high quality videos of lectures and lab experiments for e-learning and online programs to help students have a better learning experience and increase the credibility of your institution.