
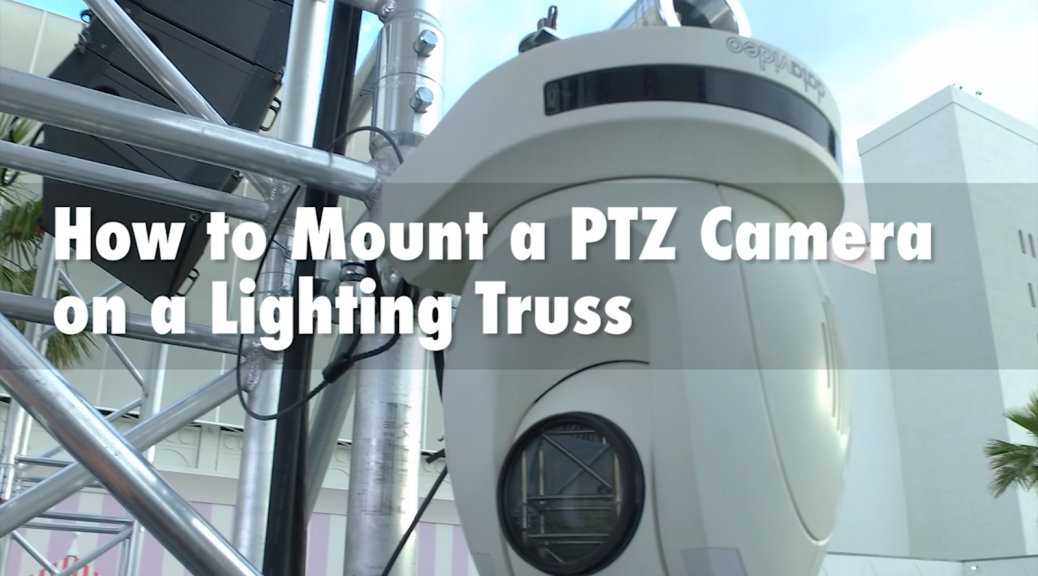
With rigging, support and truss equipment you are afforded so many more possibilities as to where you can mount your cameras. Lighting rigs can range in size and shape, but one of the most common diameter’s is 2 inches. In this How To guide you will learn how to mount a PTZ camera on a standard 2 inch lighting truss.
You can watch the video below, or follow along in the article.
When deciding where to mount your cameras, instinctively we consider where a tripod could be placed and work out angles from there. Even a jib, with its extended arm and high angles, essentially has a giant tripod on the ground as its base. A lighting truss however, is an excellent place to mount cameras.
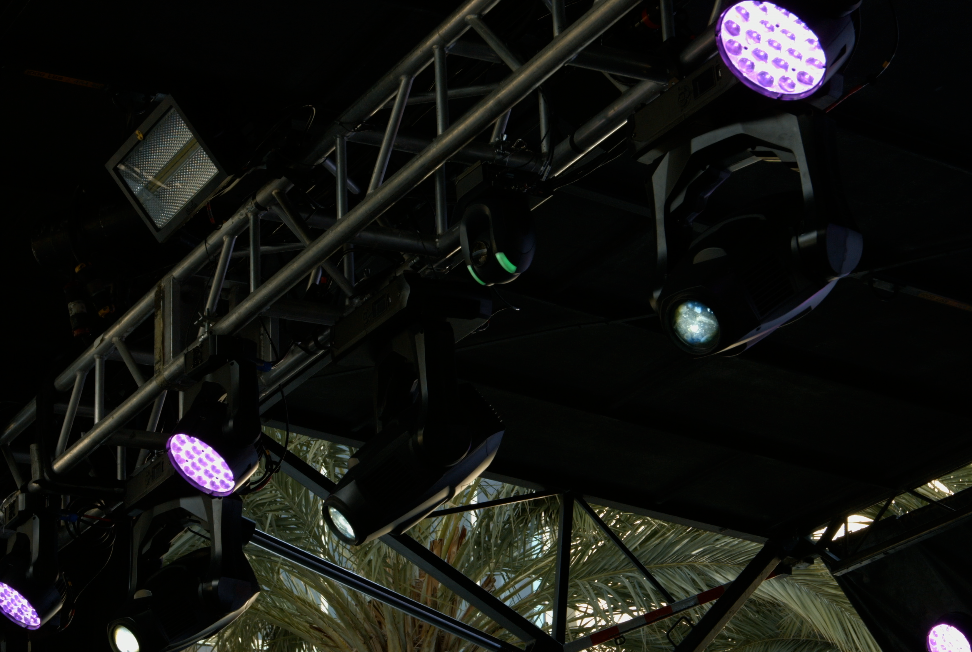
You can see an example here, of Datavideo PTC-150 Cameras shooting concerts at the 2016 NAMM Show.
Being able to mount your camera on a truss will be useful for shooting live stage performances. In this tutorial we show how to mount the Datavideo PTC-150T camera on a lighting truss.
Before you start, you need the right equipment.
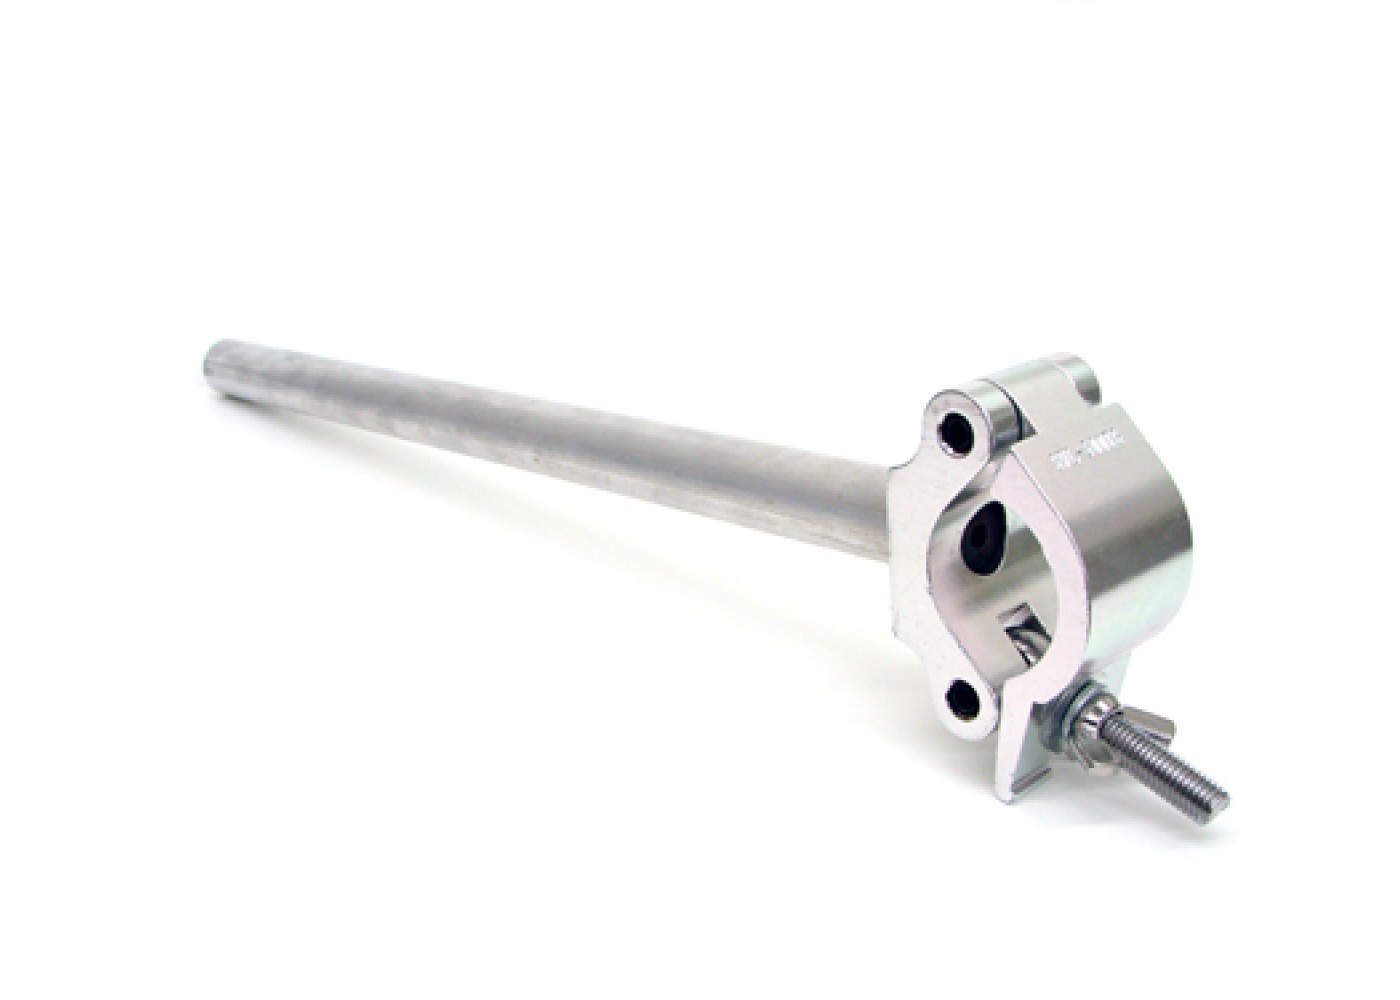
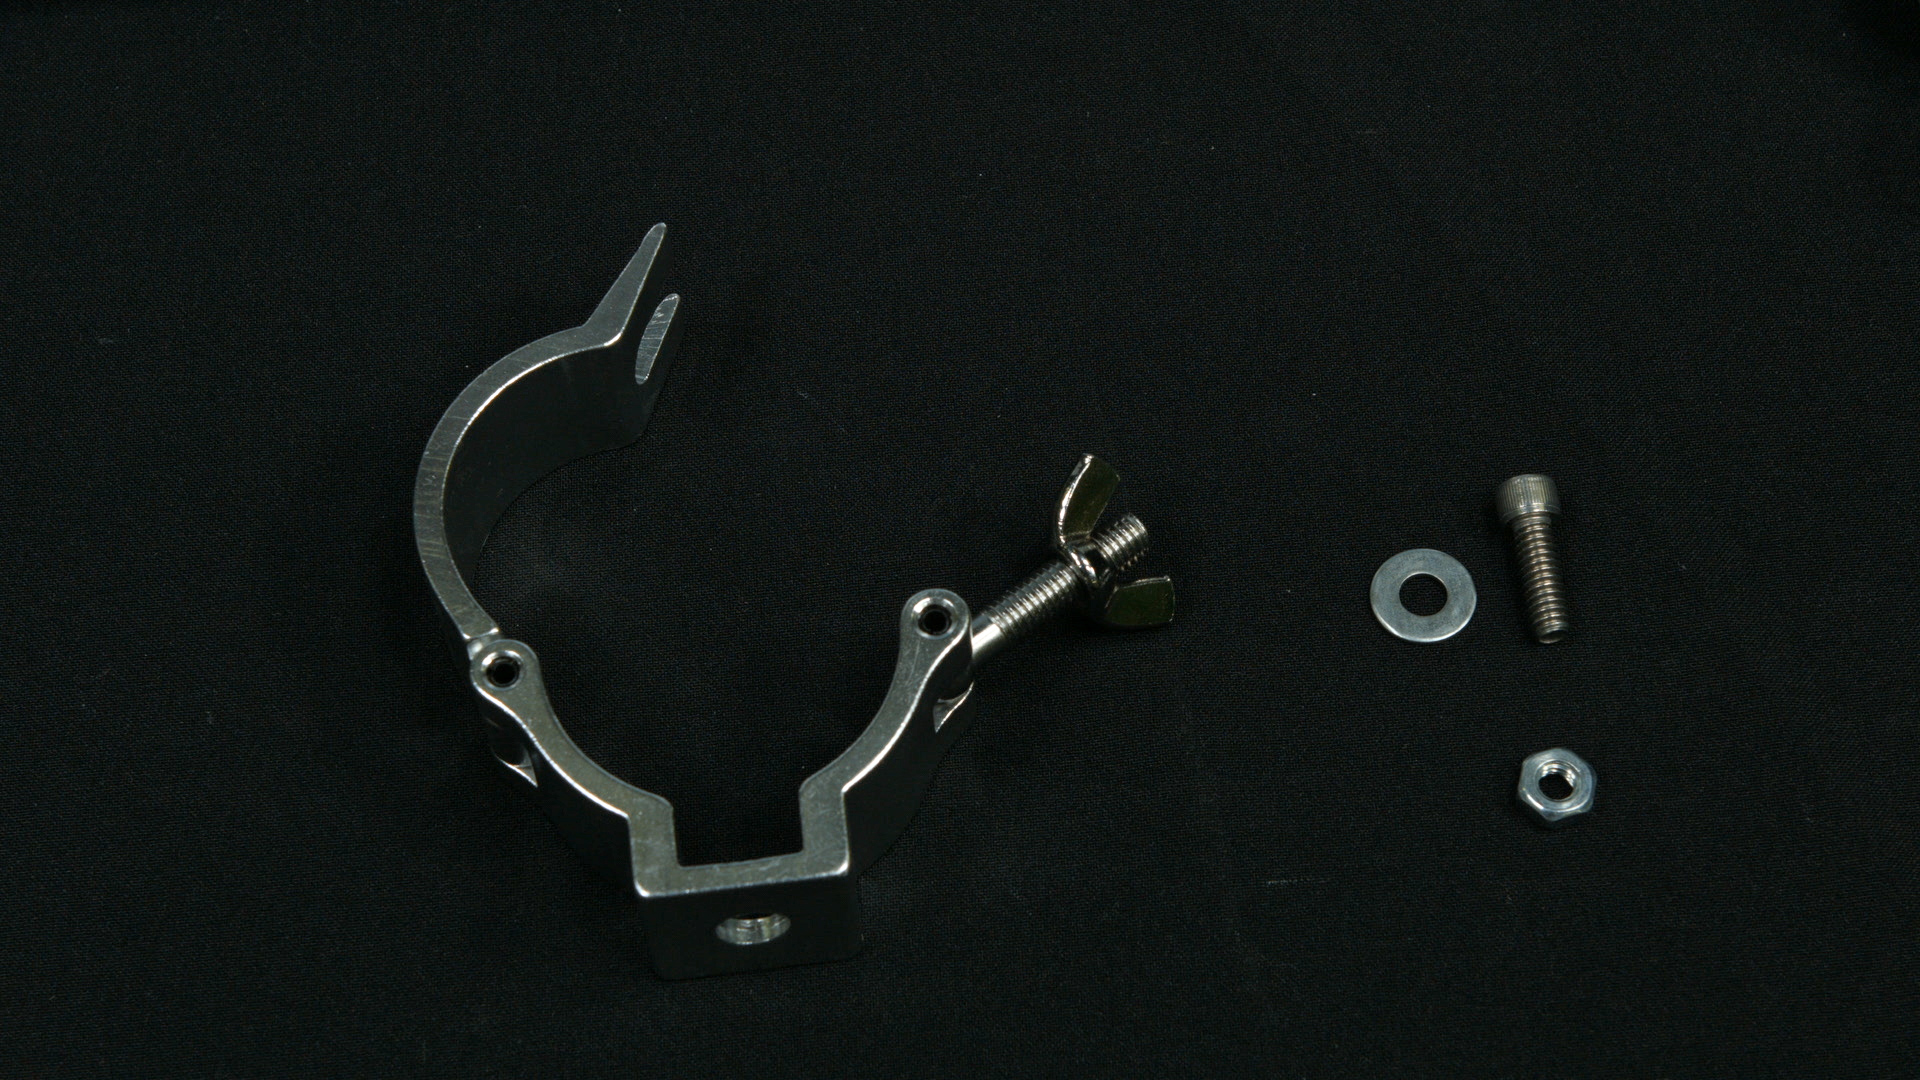
We recommend using a ‘two inch wrap around truss clamp’ and a ‘boom arm.’ These will give you the flexibility to mount your camera just about anywhere on a lighting rig. You will also need a one inch long, quarter-twenty bolt, and some washers.
First, turn your PTZ camera on its side, and rest it gently on a flat surface. Be careful not to put too much pressure on the camera housing or you may damage the motor.
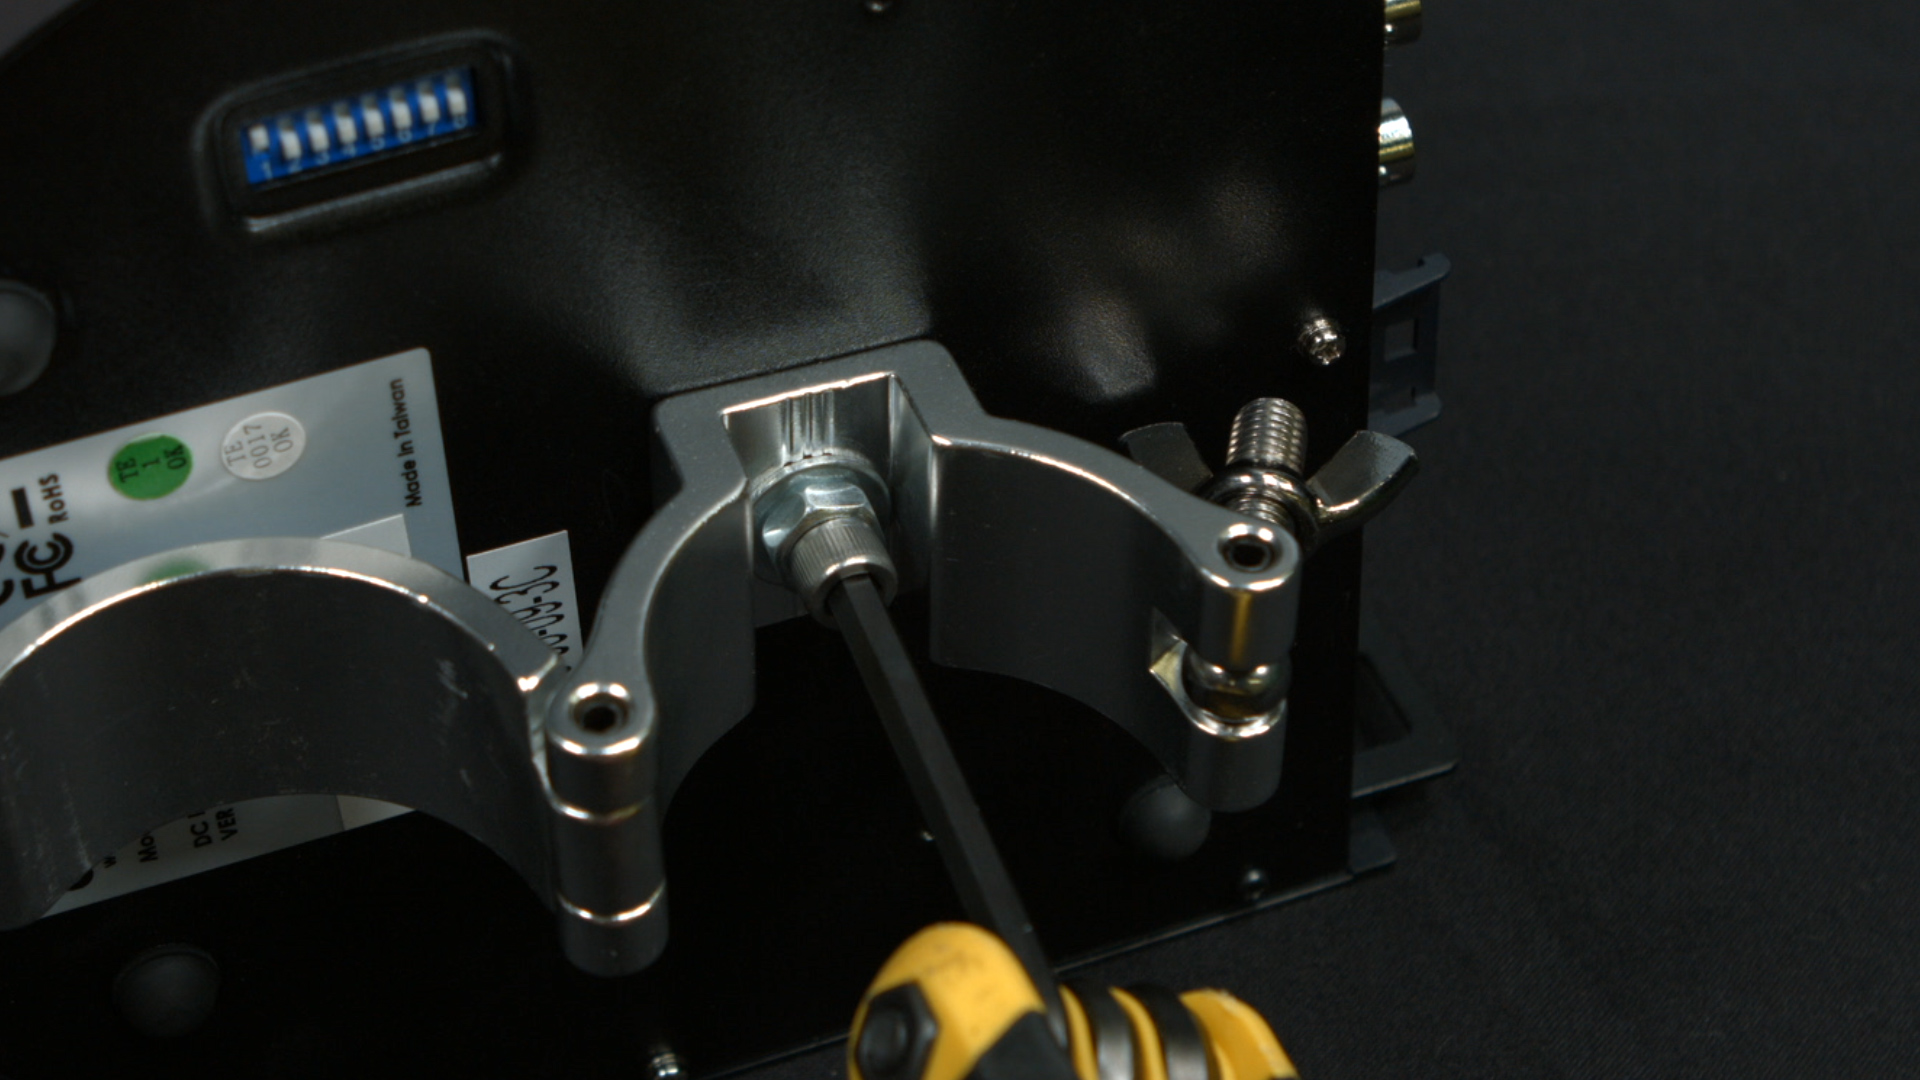
Next, place the ‘two inch wrap around truss clamp’ over the P.T.Z. camera’s quarter- twenty thread, and screw in the bolt. You can use washers to fill any gaps and secure it tightly. Angle the truss clamp perpendicular to the direction you want your camera facing when it is mounted.
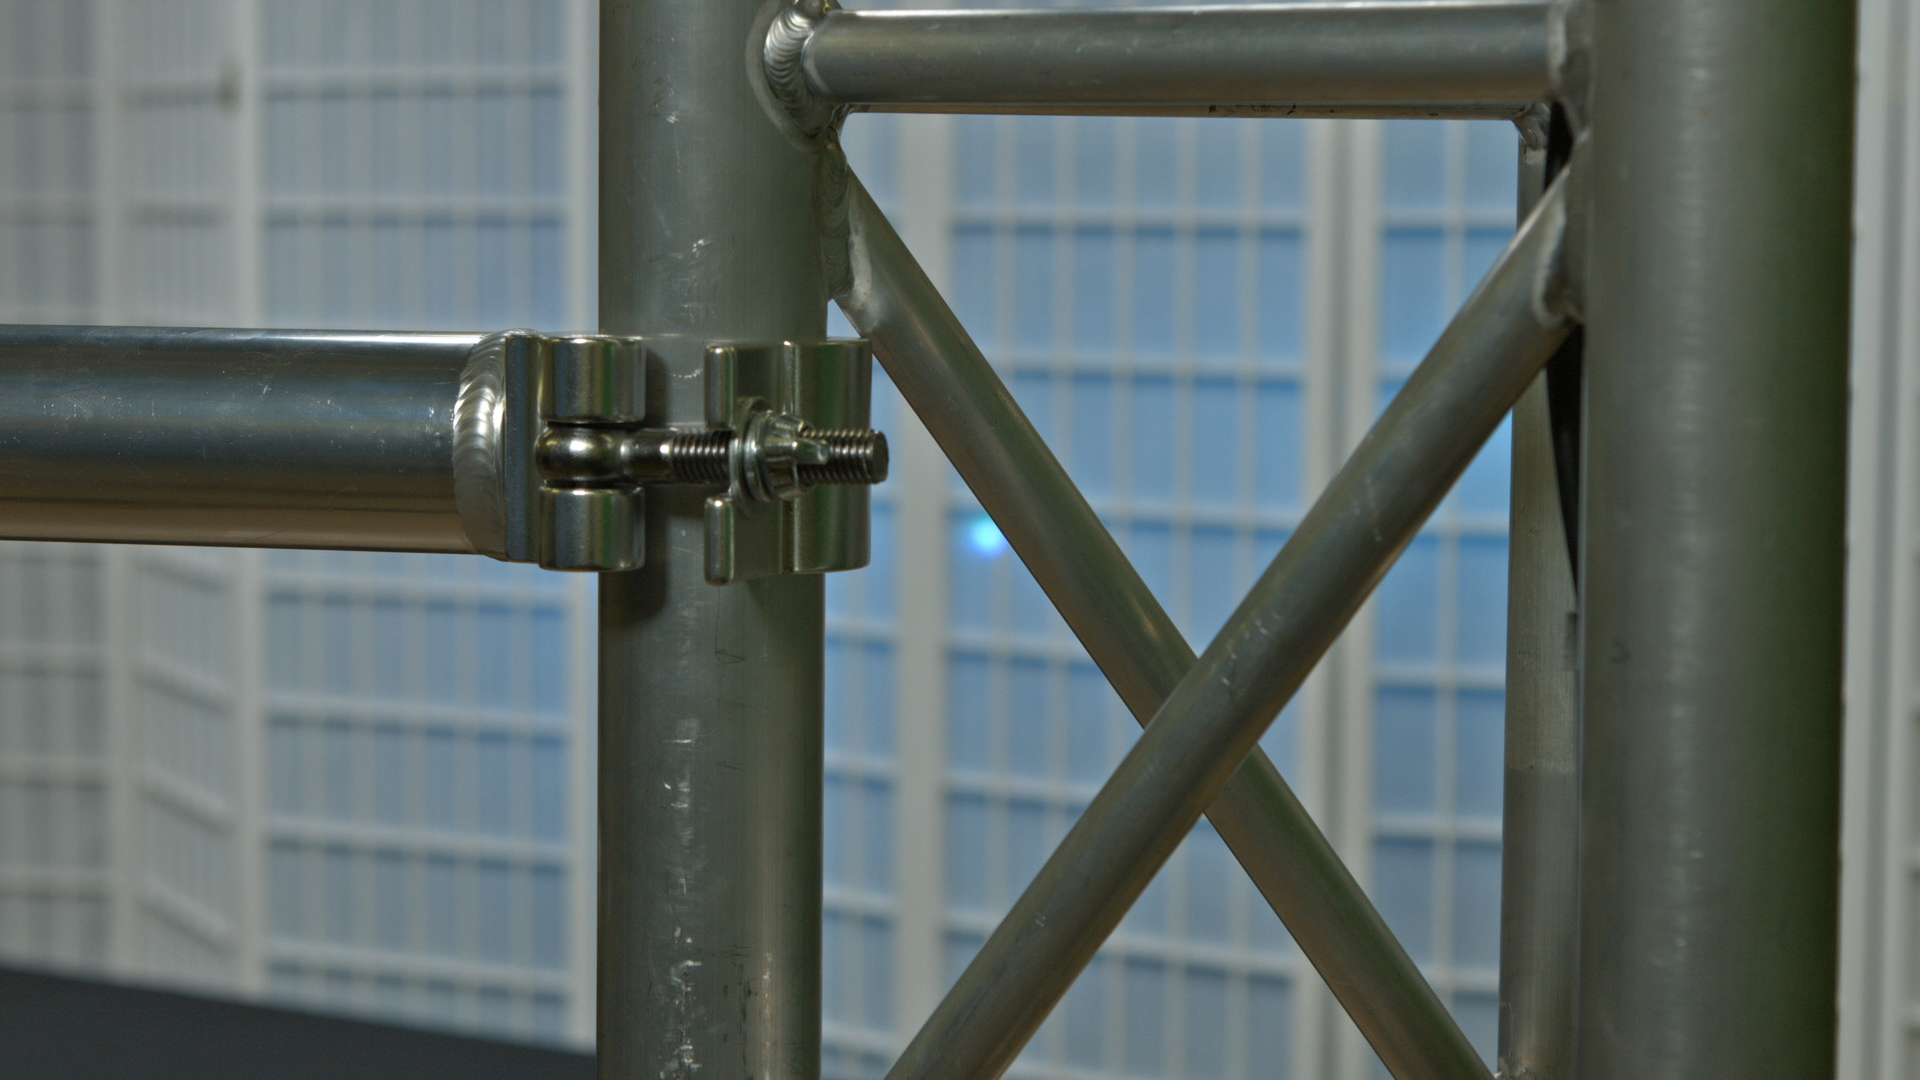
If you need your camera to be mounted horizontally, you may will need the boom arm, like the one we have here. The boom arm will connect to the truss with the same type of clamp used to mount the camera. It will serve as an extension of the truss, with the same two inch diameter, and allow you to mount your camera.
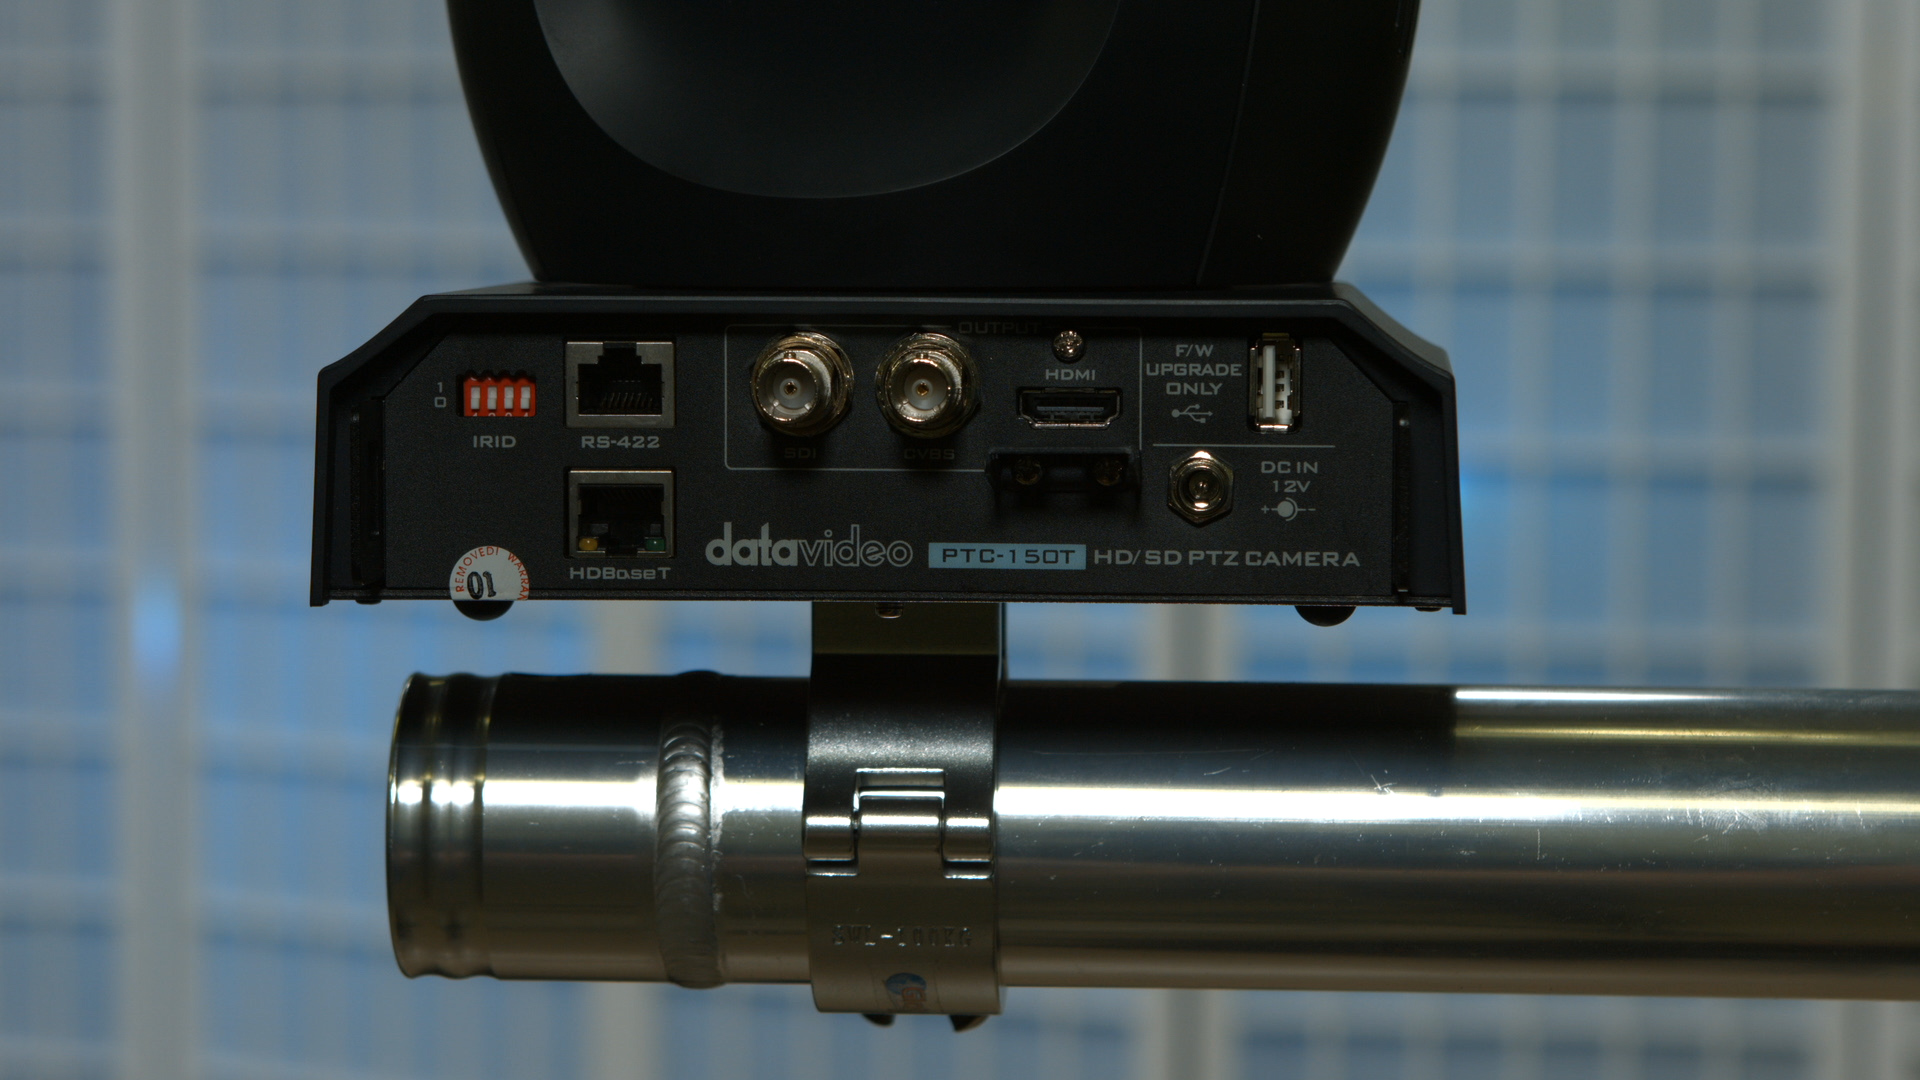
After you connect the boom arm to the truss, mount the P.T.Z. camera with the truss clamp secured. It is also always a good idea to connect safety cables to the camera and truss to keep it from falling if it is accidentally struck by someone, or something, while it is mounted.
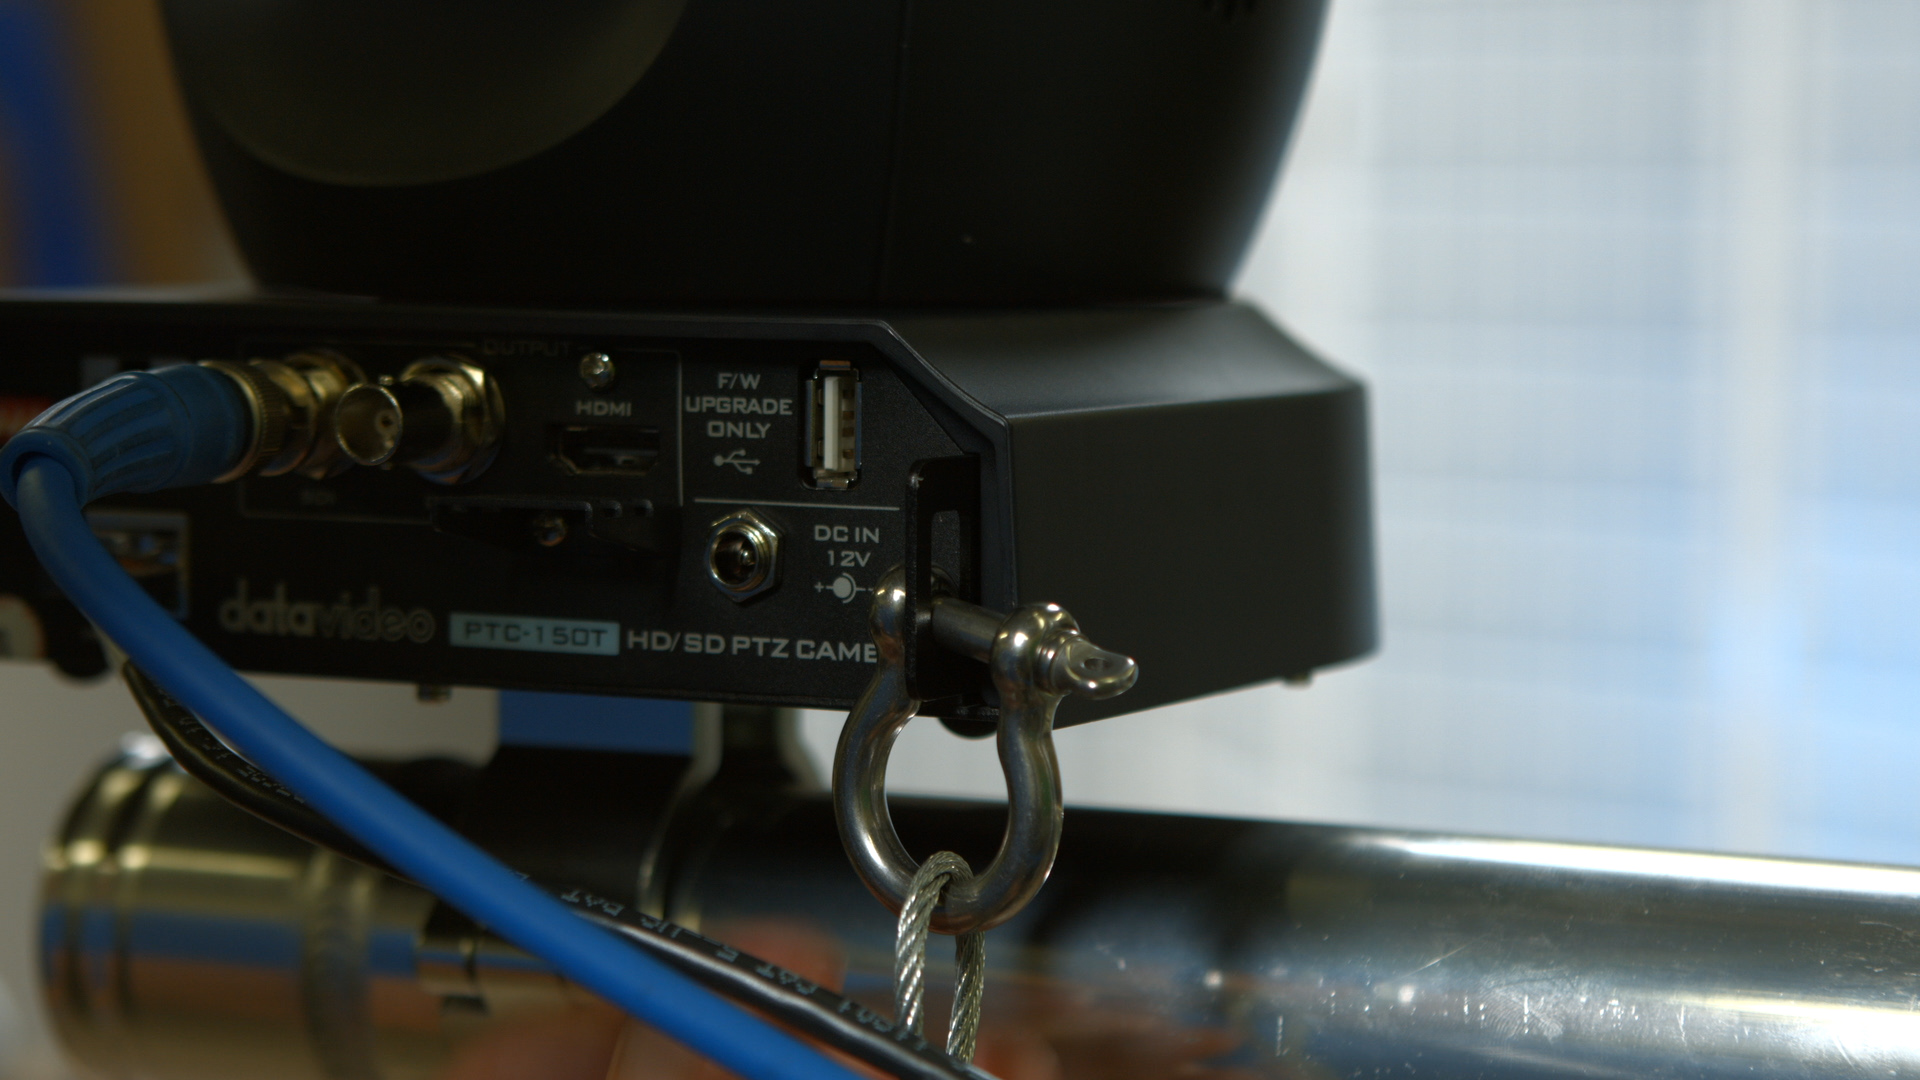
Give one final check to make sure everything is secure, and you can start connecting your cable runs.
If you are looking into acquiring new PTZ cameras, the Datavideo PTC-150T and Panasonic AW-HE40 are two of the most capable and affordable cameras on the market. You can check out the comparison blog in a previous live production blog article, click here!
Product used in this video:
2” Wrap around Truss Clamp: http://www.fullcompass.com/prod/10962…
Boom Arm
http://www.globaltruss.com/ProductDet…
Datavideo PTC-150T HD PTZ Camera :http://www.datavideo.com/us/product/P…
16″ Safety Cable: http://www.markertek.com/product/safe…
*IF YOUR TRUSS IS NOT 2″ in diameter, you may need different clamps. Contact us for questions!